Grey Striped Pyjama Pants
Here’s another sewing project I recently detailed on Mastodon. The original pattern is “Eastwood Pajamas” (sic) by Canadian company Thread Theory[1]. In addition to altering the pattern, I used a different construction order and sewing techniques from the original.
Fabric Choice
This was the third pair of pyjama pants I made from this pattern this year; the first two were flannel. So, for this pair, I wanted a lighter fabric that would be better for summer while still super comfortable since I’m in pyjama pants a lot, sometimes all day.
After pre-washing and drying the fabric twice, I wasn’t too happy that it felt rough and was linty as if it was pilling. Only as I took it out of the dryer the second time did I remember that I had purchased a linen/rayon blend, not 100% linen. Oops! Oddly, it had more stretch with the grain than the cross-grain when wet, but my research concluded that it’s most likely due to the rayon. I washed & dried the fabric three times before steam ironing with spray starch to prepare it for cutting out the pattern.
I paid over $50 for 2½ yards of this fabric in downtown Toronto, which makes for expensive pyjama pants, and even more so when you add the cost of elastic and drawstring, never mind thread, interfacing and sewing tools! The fabric store I most often shop at closer to home sells me gorgeous 100% linen for much cheaper than that.
Picking a Topstitching Thread
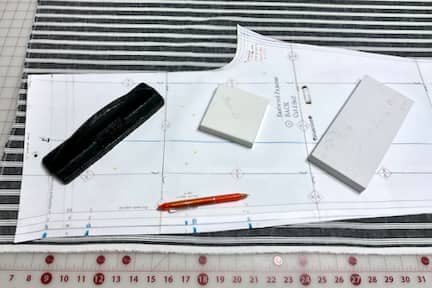
Once all the pattern pieces were cut out, I had the scraps I needed to make a couple samples to test different topstitching threads.
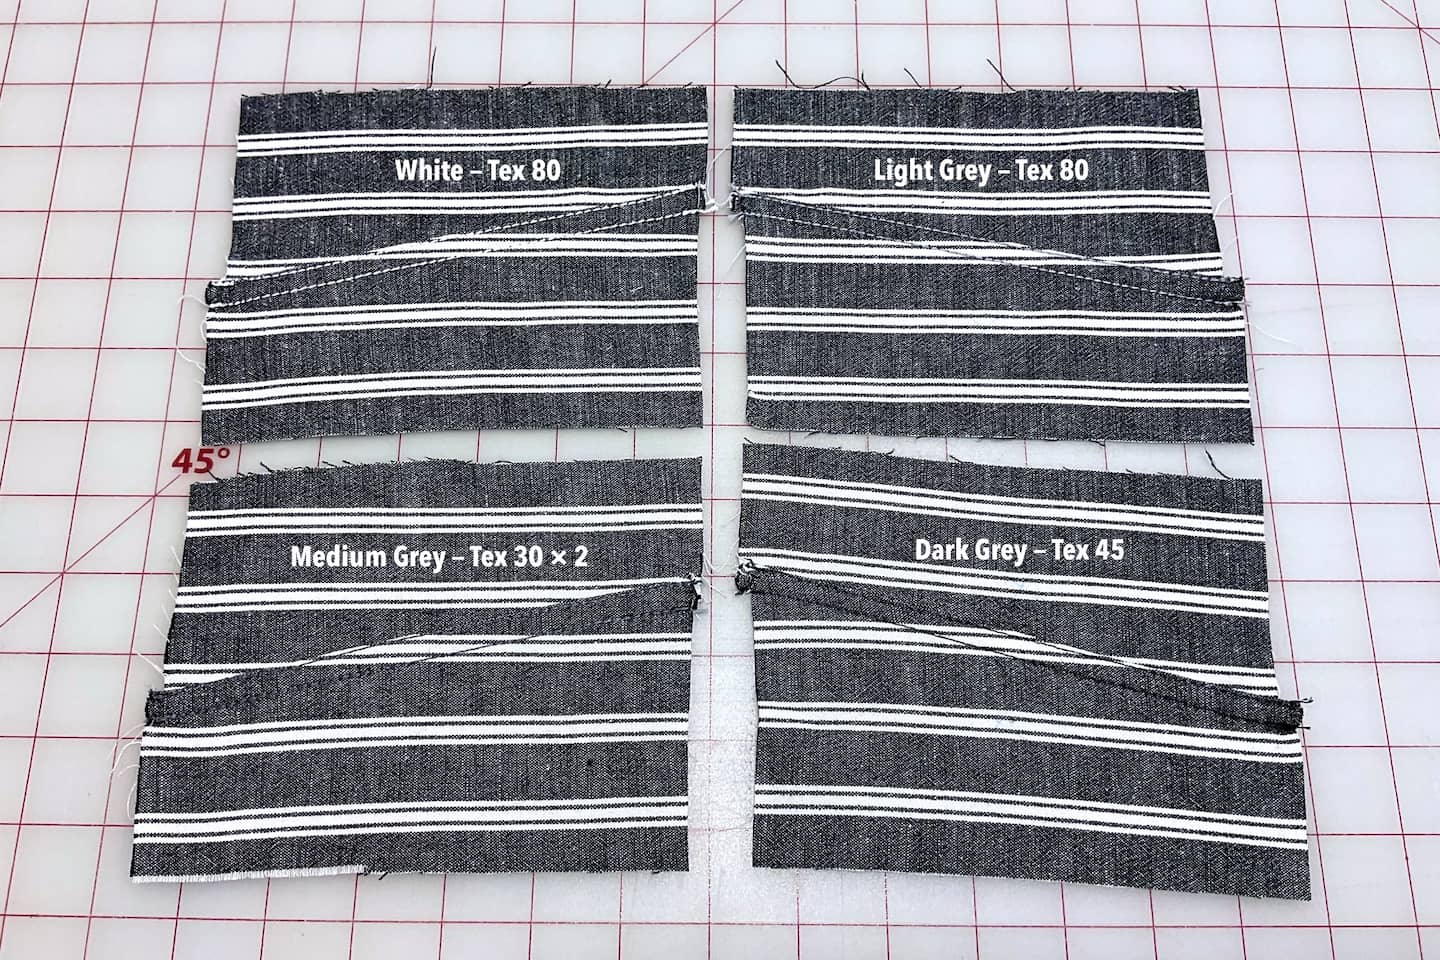
- The darkest grey thread provided good contrast; Tex 45 thread is considered “heavy duty” for garment construction seams but is a bit thin for topstitching.
- The medium grey thread was Gütermann sew-all (Tex 30), which meant I’d have to double up two spools for topstitching, which is a little annoying.
- The lightest grey thread was Tex 80, which is best for topstitching only, so I’d have to find something else to use for the construction seams.
- The white thread was also Tex 80, as was the light grey, but I have tons of Tex 30 white thread to pair it with.
I was planning on using red thread for the drawstring holes & bartacks and maybe even for the looper thread on the single-needle chain stitches (inside) when topstitching the elastic waistband. But many sewists on Mastodon had the idea of using red thread for everything, which is why I created a fifth sample (and oriented the samples correctly in the photo the second time.) I was sure I wouldn’t want red topstitching everywhere, and creating the additional sample confirmed it — even at a lightweight Tex 27, the red thread stood out way too much.

To my eyes, the white looked okay. Light grey? Might as well go with white. The medium grey blended in well, but it wasn’t topstitching thread, and I was very reluctant to double up two spools of sew-all thread. Just as I was leaning towards buying some of the medium grey thread in a topstitching weight (since the print is already busy enough), I started thinking that maybe I actually did want or need the seams to be very well defined so that breaking up the white stripes around the pants’ curves wouldn’t look too weird…
I’m never this indecisive about anything; looking at the fabric so much made me start to hate it; I began to wonder how I ever got convinced to buy it. I also suffered from a significant fall that required a visit to the ER just as I was going out to purchase topstitching thread, so that didn’t help either! I have a habit — for better or worse — of always finishing what I start no matter what; if it were otherwise, I would have just bought new fabric in a solid colour and started over again. Besides, I had already cut all the pattern pieces out of the fabric by then.
Since I couldn’t leave the house for over two weeks after that nasty fall, I thought to order some Gütermann Mara 30/Tex 100 topstitching thread in the medium grey colour online. But while preparing my online order, I realized I already had a spool of Tera 40/Tex 75 thread in the same colour. Gütermann Tera is marketed as upholstery thread (among other uses), but I convinced myself it would still be okay to use.[2]
Side Seam Pockets

Finally, I attached the side seam pockets, bartacked at the openings and basted them down to prevent them from getting in the way while constructing the button fly. The impressive thing is that I managed to do it all one-handed (albeit ridiculously slowly) with minimal help from my left hand since my left arm was still in a lot of pain and was taking a long time to recover from that fall!
Similar to many other patterns, the included pattern instructions require you to clip the finished side seam allowances and tell you to start by finishing the pocket pieces individually, which I never like to do because it creates too much unnecessary bulk. Over the years, I’ve been tweaking my own set of instructions for side seam pockets by combining the best practices shown in numerous YouTube tutorials. Here are three videos that demonstrate the basic technique — two of them are in Spanish, while the other one has English text in the video but no audible dialogue:
- Confección de Short – Costura Fácil
- Bolsillo Lateral Para Short o Pantalón — Tips de Confección
- How To Sew Inseam Pockets Two Ways — Thuy Sewing
Flat Felled Seat Seam
Next, I created a flat felled seat seam, but since I felled it from the outside, the interior looked matched and not the exterior. Over 90% of my wardrobe is solid colours — a strong preference of mine — so pattern matching is not something I often do. Had I not already trimmed one of the seam allowances, I would have immediately seam-ripped it and felled from the inside instead.


But of course, I wouldn’t be me if I left it like that or if I used my busted arm as an excuse for shoddy work…


I ripped out the two rows of stitching and sewed it again, this time felling from the inside. It was a little tricky since I had already trimmed one of the seam allowances, but it was still doable. The last three stripes near the crotch were off by about 1mm, but I didn’t expect anyone would ever be looking there too closely! At least it was better than before.
Button Fly
The button fly was next.


Without contrasting thread, it’s hard to notice the detailed button fly stitching, but if you zoom in on the photos, you’ll notice that the outer line of topstitching is right next to one of the white stripes… With the side seams completed, you can see that the pocket topstitching is also right next to one of the white stripes (on both pockets). The pocket bartacks may have looked a bit long before because they extend into the seam allowance — for a cleaner final look — since they were completed before closing the side seams.
Flat Felled Inseam & Topstitched Side Seams
Here are some photos with the side seams sewn, overlocked and topstitched and the inseams sewn with a flat felled seam:


Elastic Waistband
And finally, the completed elastic waistband:


I appreciate that the pattern instructions detail how to bind the waistband for a cleaner finish inside. But since I was focused on ultimate comfort and reducing bulk as much as possible, I deviated from the instructions — which meant I also had to modify the pattern — and serged the elastic on, followed by topstitching three rows of single-needle chain stitches using my coverstitch machine. Perhaps it’s a bit less attractive to see a serged elastic waistband from the inside, but I think it makes it much less bulky and more comfortable to wear.
Hems
Hems on pants are boring and never something people bring attention to, but with these hems, I will brag a little about my sewing skills; I like to challenge myself to constantly improve while having fun. I managed to get the inner line of topstitching exactly ⅛” from the edge, consistently around the entire circumference of both hems without using any guides or specialized presser feet and by going entirely by feel from the outside. (I used topstitching thread on the outside and lighter thread in the bobbin for the inside.) Had I sewn this from the inside, it would be no big deal, but from the outside?! Getting this level of consistent accuracy is a notable achievement! Here’s a photo from the inside so you can see how well I nailed it:

Practicing skills with all those napkins is paying off!
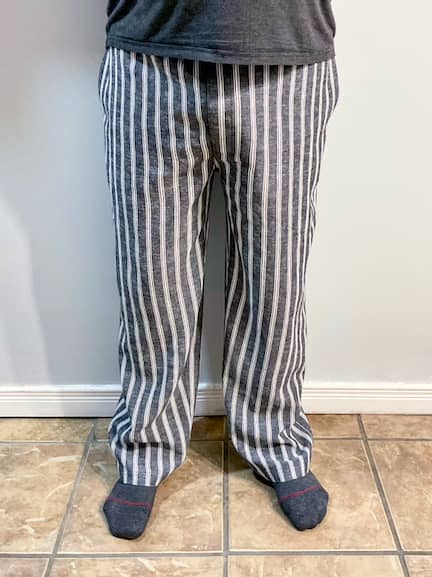
Trying on the Pants
I forgot to give the pyjama pants a quick ironing before getting photos of me wearing them, but they weren’t too bad:


As I mentioned at the start, these were the third pair of pyjama pants that I made from this pattern this year, which makes it all the more interesting that the other two ended up being the perfect length while this pair ended up a bit too long, as you can see in the third photo. Weird! I know I cut them all precisely the same. Is it because the other two were flannel?
Drawstring
The only thing still missing was the drawstring because I hadn’t yet purchased it. Ordinarily, I buy twill tape and drawstring for around 50¢/yard or less, but this red drawstring was expensive at $2.50/yard!


I expected to do zigzag bartacks on the drawstring ends, but the drawstring wouldn’t easily roll back into itself, so I had to find another way. It was also too thick & heavy to fold in three to encase the raw edges (like I do with twill tape), so I thought to melt the ends with a hot knife. It took a lot of practice to be able to do it neatly!


I think the ends came out nice, but it wasn’t easy. I spent a lot of time figuring out the right temperature, finding the right amount of time to hold the trigger down on the hot knife, burning my fingers, deciding how long I wanted the melted ends to be, trying pliers to neaten and flatten the melted ends, using my fingers to mould it into shape instead and burning them some more, etc., etc. Lots of trial and error!
Final Thoughts
Almost all of my clothes are solid black, grey, white or navy blue; I haven’t gotten used to these crazy busy stripes; even the red drawstring still takes me out of my comfort zone. They’re not ugly pyjama pants — there’s a lot of precise topstitching and attention to detail — they’re just not “me.”
The linen/rayon fabric has a nice feel when it’s ironed, but it has a bit of a grainy, somewhat rough feel when it’s not ironed. It’s like the worst of linen paired with the worst of rayon rather than the best of both. I don’t iron any of my other pyjama pants, so these are much higher-maintenance in comparison.
After the first wash, these pyjama pants shrunk from being loose-fitting and almost baggy to fitting a bit tight everywhere and approaching comically short. Good thing I hadn’t given in to the temptation to trim them and re-do the hems! You might recall that I pre-washed & tumble-dried this fabric three times and even steam-ironed it before cutting out the pattern pieces. I usually only pre-wash twice.
They were super comfy pyjama pants when I first wore them, but especially now that they’ve shrunk so much, I’m thinking of donating them with the hopes that someone who really likes this look will love them…